New Star 1/6 Harley Davidson FLH Classic-01
OK let’s get the “elephant in the room” out of the way in that when I brought and made this kit back in 2016 I found out it wasn’t a genuine Tamiya kit, but one done by a firm called “New Star”, and oh didn’t the fun start as soon as I opened the very large box to see what was inside.
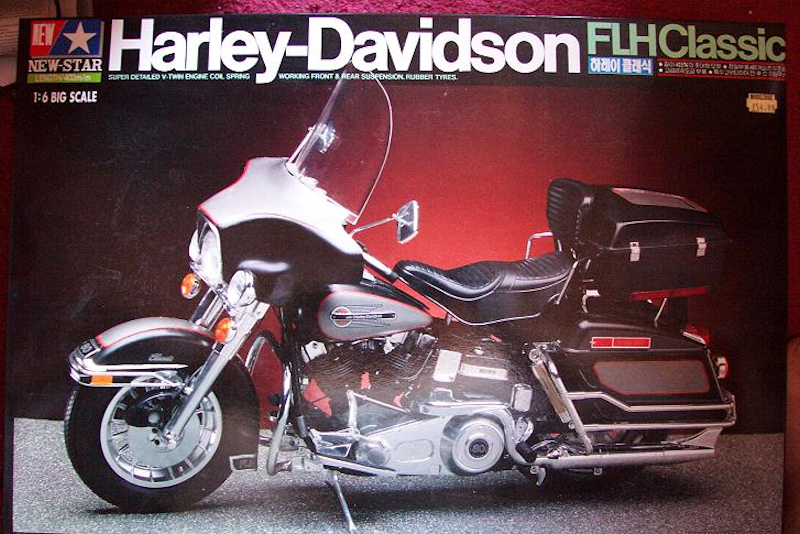
The only good points were all the parts were in bags, the metal parts and screws were well protected and labelled . The instruction book was well detailed with diagrams & part numbers & it is a good job as there are no English translations for the Japanese notes, but by looking at them together with the relevant sections you can understand what they mean, or as it’s now 2020’s use a translation app.
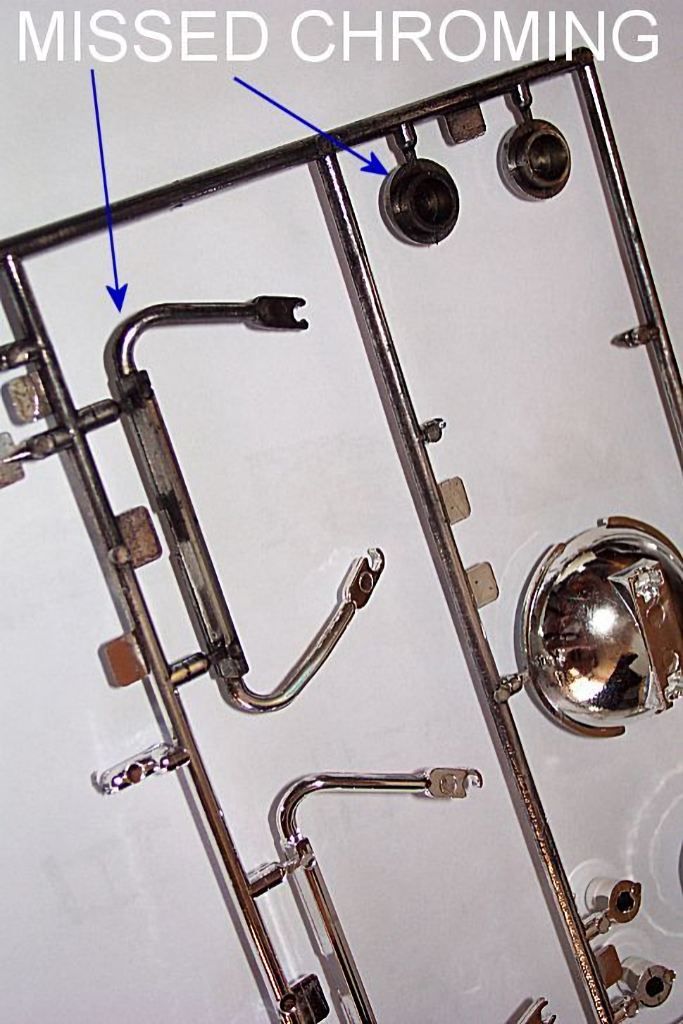
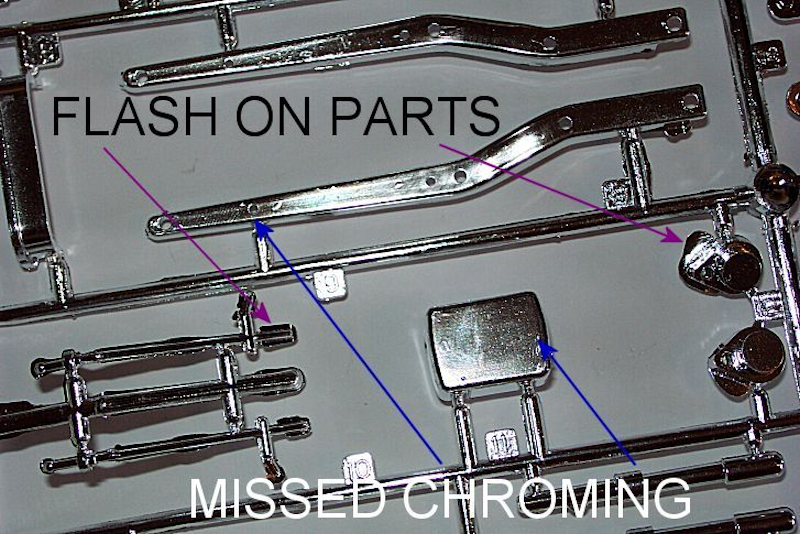
After my intitial pleasure I began to notice that all was not well. with closer look at the sprues I could see some very serious problems to come.
Some of the Chrome plating had not worked on one of the sprues & on a lot of parts faded to its natural black plastic colour. Some of the other chrome parts were either scratched, had a lot of “flash”, or very obvious mould lines. I had a long think about what to do to resolve all the issues, and my wife could see on my face the problem I would have trying to use chrome parts as they were, it was her idea to do a “custom” paint job on the bike (thanks dear you always help me see the bright side).
This would allow me to remove all the seam lines & scratches & give a personal touch. A quick walk to a local autoshop (Halfords) & with my Sarah’s help we chose a metallic red for the main parts (fuel tank, “fenders” and fairing), a dark copper together with a pale gold scheme for the old chromed parts married to a black frame.
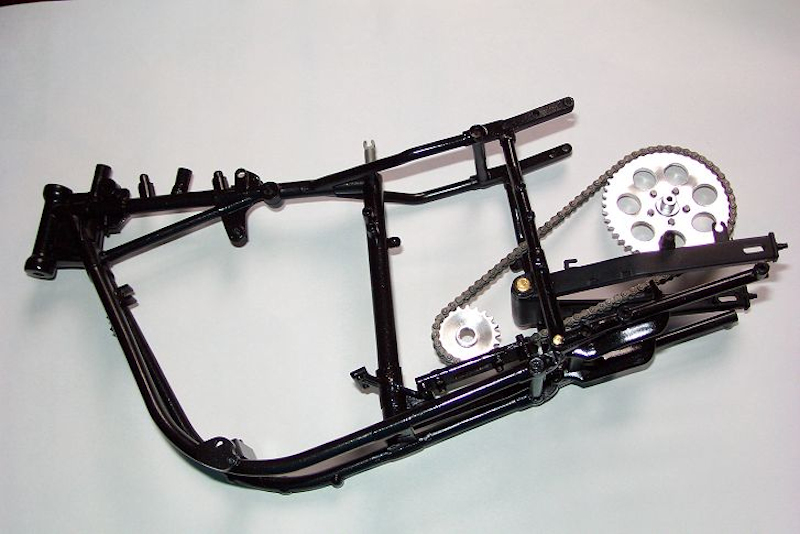
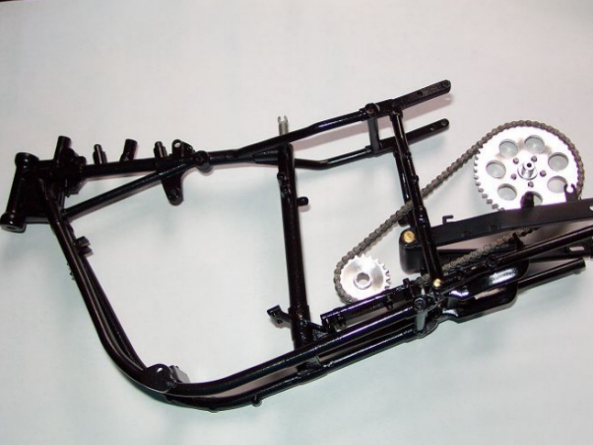
Now to start on the main frame of the Harley, there were shaded areas on the instructions that said would need to be removed, as in this version of the Harley nothing is fixed to these points. The only problem I had had was with part No. N8 as this had a nasty seam line & the matt chrome coating was scratched, so out came the sanding sticks & I decided to paint it the same colour as the frame.
The chain in section 3 was painted in Tamiya metallic grey & given a black ink wash to bring out the link detail. I then sprayed the frame in gloss black & the completed suspension arm in satin black. I did not fit parts F7 & F8 as these were to be painted in the custom colours later. To continue with the paint scheme I highlighted the part No. L28 in gold.